The Quick Guide on how to get started with Intelliprint
Welcome to Intelliprint, the platform that streamlines your postal mailings by automating the printing and mailing process. With just a few clicks, you can create, send, and track physical letters for your business. Intelliprint provides a user-friendly interface that simplifies the process of printing and mailing letters. In this guide, we will explain how Intelliprint works, step-by-step, from registering your account to viewing returned letters. Whether you need to send one letter or thousands, Intelliprint has you covered. So, let’s dive in and explore how to get started with Intelliprint.
How to Register with Intelliprint:
Creating an account with Intelliprint is a quick and easy process. Follow these simple steps to get started:
- Go to https://dashboard.intelliprint.net
- Enter your email address and click on “Register”.
- Check your email for a confirmation link and click on it to verify your account.
- Provide some basic information such as your account name, promo code, and acceptance of terms and conditions.
- Click on “Let’s Get Started” to complete the registration process.
- To start sending letters, add credit to your account. Please refer to the “How to Pay” tab for instructions.
Congratulations! You now have an Intelliprint account and can start sending letters hassle-free.
How to Pay Intelliprint
We offer three convenient payment options to suit your needs:
- Prepay: Add credit to your account and use it to pay for your letters as you go. This option gives you full control over your spending and allows you to easily manage your budget.
- Pay Later: Set up a Stripe direct debit mandate, and we’ll automatically charge you for any letters sent during a particular month. With no contracts or minimum spends, you’ll only ever pay for what you send.
- Invoice: We can send you an invoice to be paid within 30 days. This option is great for businesses or individuals who prefer to receive a bill at the end of each month rather than paying upfront.
To prepay:
- Sign in to your Intelliprint account.
- From the left menu, click “My Account.”
- Click on “Billing.”
- On the billing page, click “Deposit” next to your current balance.
- Enter the amount you wish to add and proceed with the payment process.
- Your updated balance will be displayed on the billing page, and you will receive a notification when your balance falls below the cost of your mailing.
To Pay Later:
- Log in to your Intelliprint account.
- From the left menu, go to “My Account” and click on “Billing.”
- Click on “Add Bank Account.”
- Fill in your BACS details and address in the Stripe form.
- Accept the terms and conditions.
- Click “Set up Direct Debit.”
With this option, you only pay for what you send. There are no monthly charges, and you’ll only be charged for items submitted via your account within a given month. We’ll send notifications several days before a payment is taken, so you’ll always know when to expect a charge.
To pay by invoice.
If you prefer to pay by invoice, we can help you get started. Simply reach out to us via our live chat option, contact form, or by emailing [email protected], and we’ll guide you through the setup process.
Billing tab summary
From the billing tab you can also see all balance transactions and get receipts / download invoices
How to prepare your documents
Address Positioning
To ensure that your letters are printed and mailed correctly, it’s important to position the recipient’s address correctly on your document. There are two reasons for this:
- Our system only monitors a specific section of the page to extract the address information accurately.
- The address must be visible in the envelope’s address window to ensure proper delivery.
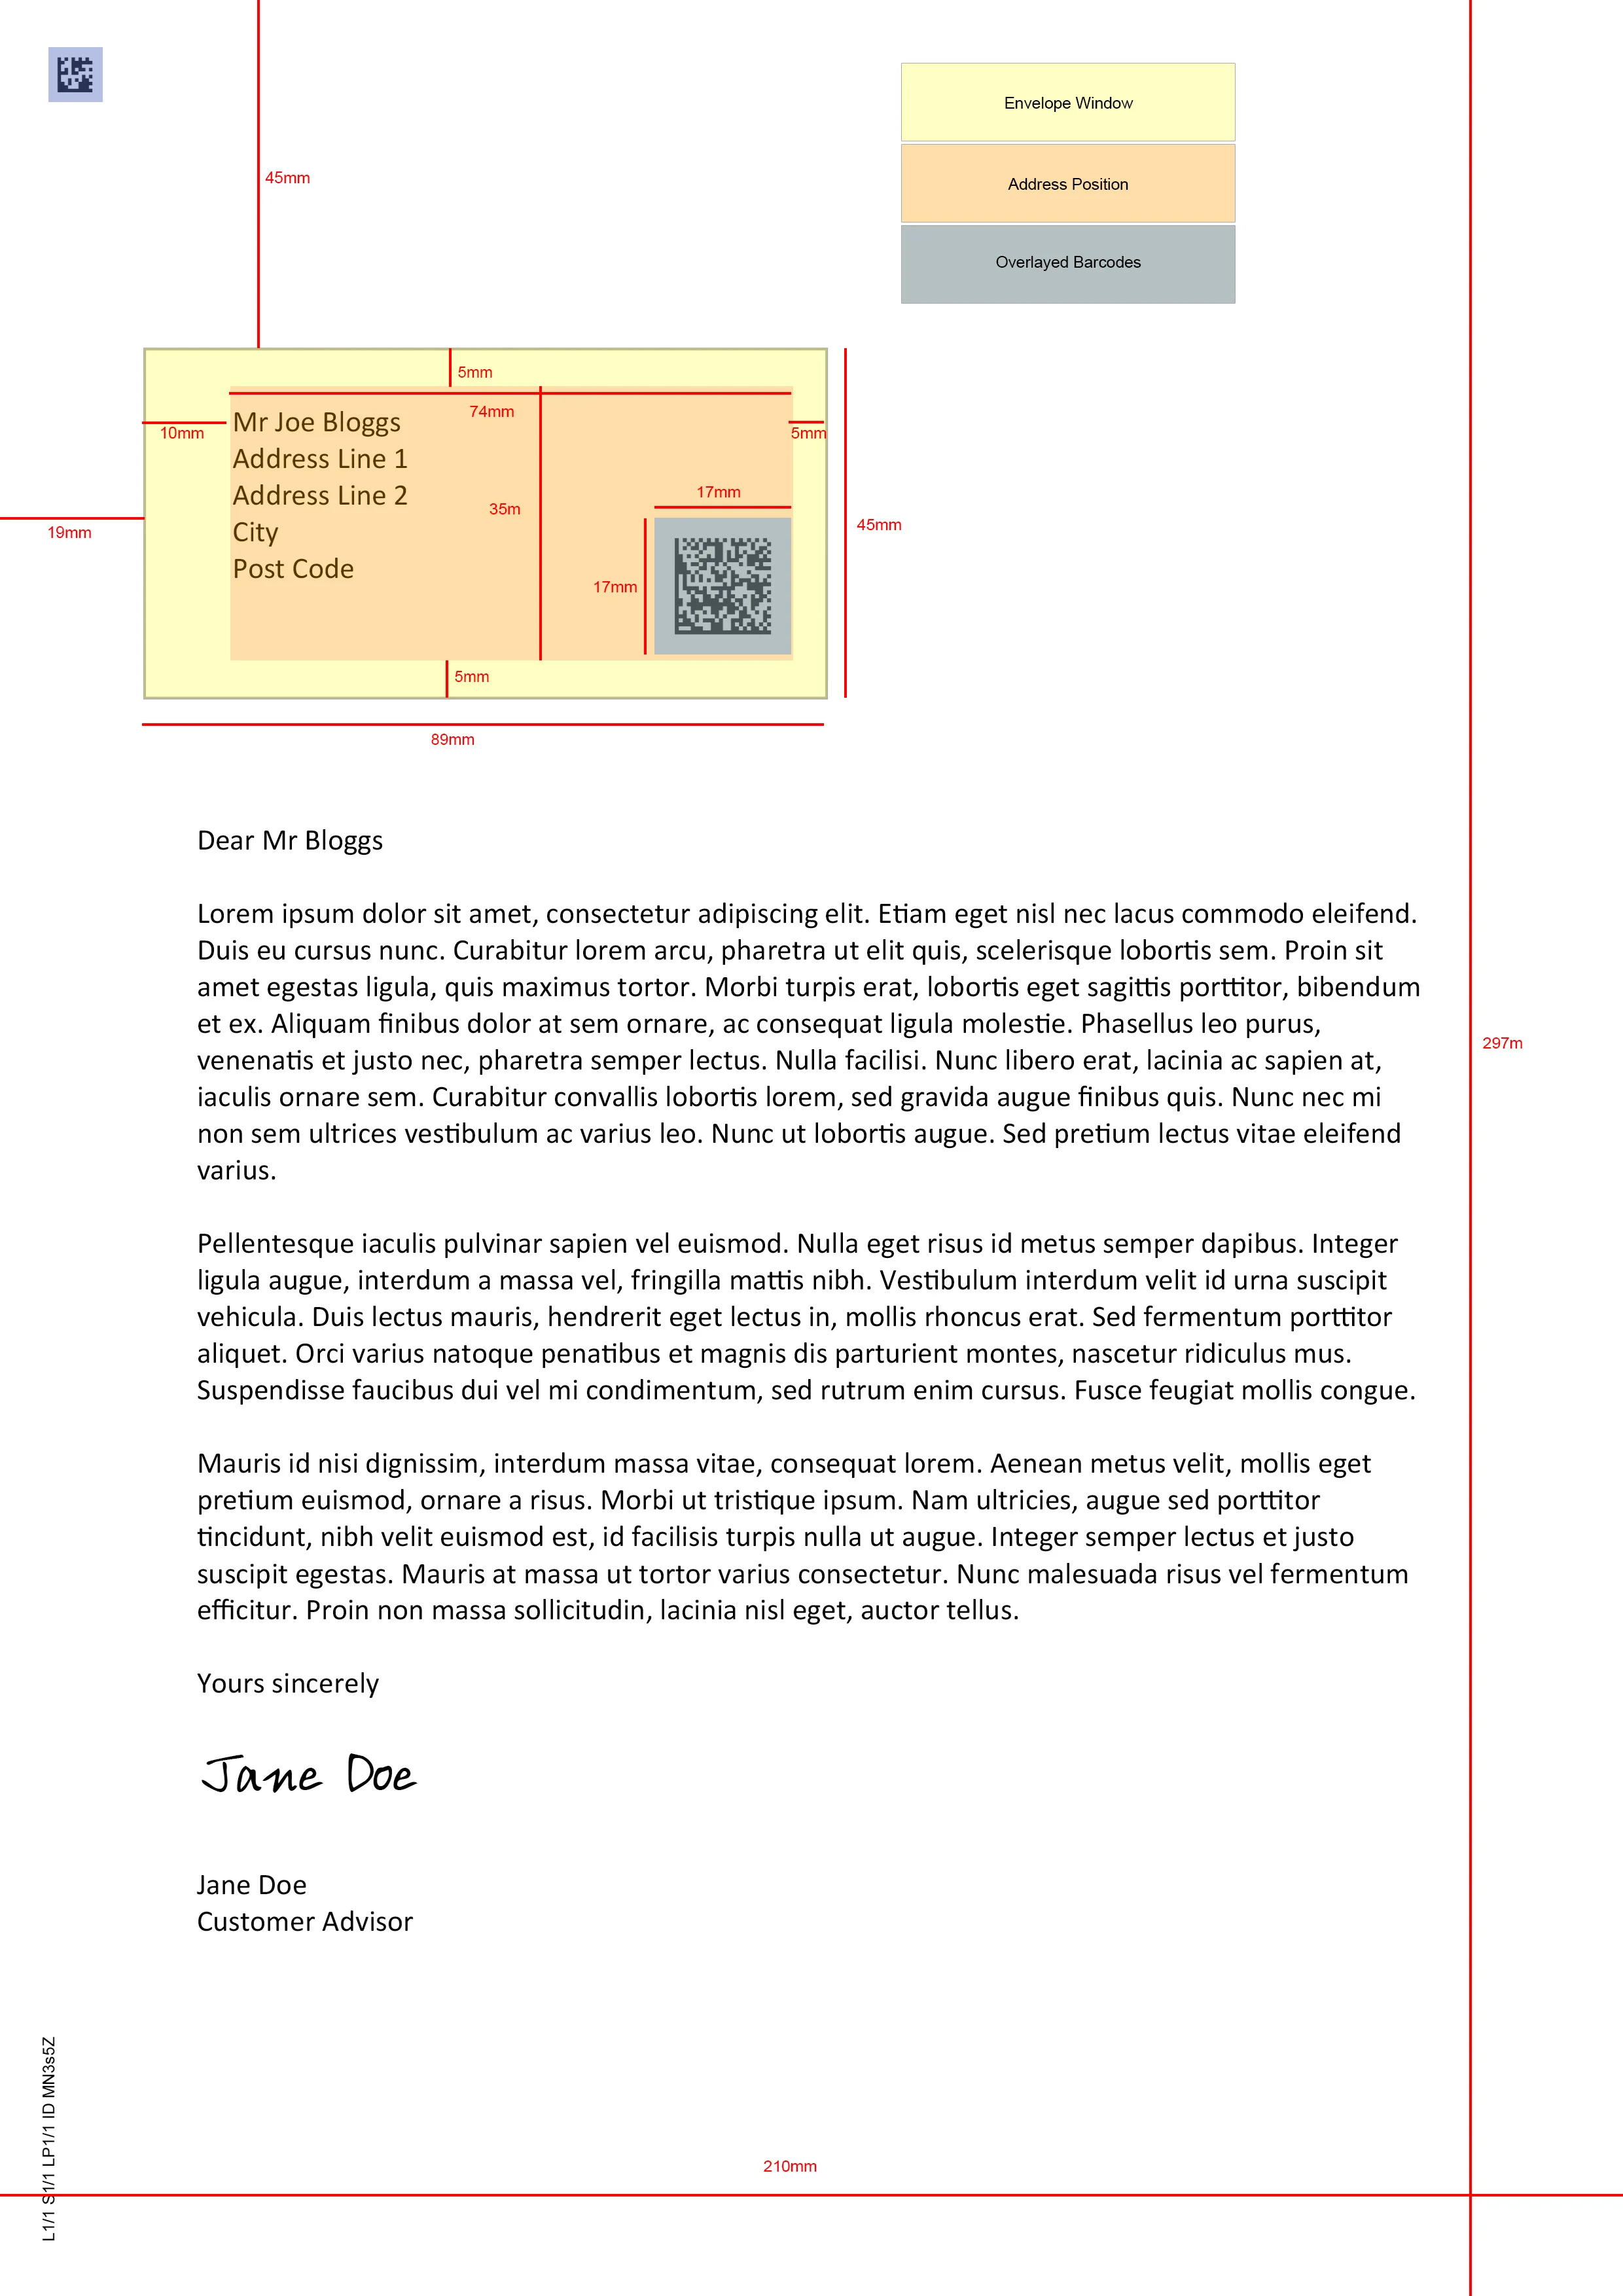
As a general guideline, we recommend placing the recipient’s address 50mm from the top of the page and 30mm from the left. This positioning allows for 6-7 lines of address text, providing ample space for the full address.
If you’re uncertain about how to proceed, you may download our letter template here to help you get started.
Preferred Fonts
A single font should be used for the whole Delivery Address block, this should be using a 10-12pt font with normal character spacing and with the pitch set at 10-12 characters per inch. Only machine-readable fonts should be used, a list of preferred fonts is below for your reference:
- Courier
- Courier New
- Letter Gothic
- Lucida Console
- Lucida Sans Typewriter
- OCR B
Word Gothic Acceptable Proportionally Spaced Fonts are :-
- Arial
- Avant Garde
- Calibri
- Estrangelo Edessa
- Eurostile
- Frankfurt Gothic
- Franklin Gothic (Book)
- Gautami
- Geneva
- Gill Sans
- Helvetica
- Latha
- Lucida Sans
- Mangal
- News Gothic MT
- Optima
- Ravi
- Shruti
- Trebuchet MS
- Tunga
- Univers
- Verdana L Fonts
In general, any fonts that are used should be simple and easy to read.
The following fonts should not be used within the address block:-
- Italic
- bold
- pseudo script
- serifs
- computer zero (Ø)
- any font that looks handwritten.
How to send multiple letters at once
Sending multiple letters at once can be a time-saving and efficient way to streamline your mailing process. To do this, you can prepare your letters into a single document using tools such as Mail Merge. Mail Merge is a feature in software applications such as Microsoft Word that allows you to combine a list of addresses with a template letter to create multiple personalised letters.
The process involves creating a list of recipients and their respective addresses, designing the letter template, and then merging the two to produce a set of unique letters. This can be particularly useful for businesses or organisations that need to send out mass mailings, such as newsletters, promotions, or event invitations. By using Mail Merge, you can save time and resources while ensuring that your correspondence is personalized and targeted.
For more information, you can visit Microsoft’s guide by clicking on this link provided.
https://support.microsoft.com/en-us/office/use-mail-merge-for-bulk-email-letters-labels-and-envelopes-f488ed5b-b849-4c11-9cff-932c49474705
How to upload your documents
Drag and Drop
To upload your documents, you can drag and drop your .pdf or word (.doc, .docx) files directly onto the dashboard at https://dashboard.intelliprint.net. Alternatively, you can also search for the file on your computer and upload it to the dashboard. After the file has been processed, you’ll be redirected to the “Print preview page”.
Intelliprint Print Driver
Uploading your documents to Intelliprint is simple and easy. In addition to using our drag and drop interface, you can also upload files via our print driver.
To get started, download and install the Intelliprint print driver from our website. Follow the instructions to add “Intelliprint” as a listed printer on your computer or network. Then, open the document you want to print, ensuring the address is positioned correctly.
Click “File > Print” and select “Intelliprint” from your list of printers. Make sure the paper size is set to A4 and click “Print.” With just a few clicks, your document will be sent directly to Intelliprint for printing, enclosure into envelopes, and posting.
On the print preview page, you can customize your document by splitting it into multiple letters, adding extra pages and backgrounds, and choosing print options such as double-sided or mixed printing. You can also easily set your postage details and options, add letterheads, and additional documents, and submit your documents for posting.
Once your letters are submitted, they will be available on the “print history” tab, where you can view the status of your postal items. Letters submitted before 3 pm will be sent the same day, except for bank holidays.
With Intelliprint, you can streamline your posting process and increase your efficiency with just a few simple steps.
Intelliprint Sync
Introducing Intelliprint Sync – the new Windows application that automates postal mailings by monitoring folders on your computer. With customisable settings, you can tailor each folder to fit your specific needs, saving you time and streamlining your process. Here’s a step-by-step guide on how to use Intelliprint Sync to automate your postal mailings:
- Download and Install Intelliprint Sync: Start by downloading the Intelliprint Sync app from our website. Once downloaded, follow the instructions from the installation wizard to complete the installation process on your Windows computer.
- Sign in to your Intelliprint account: Once the installation is complete, sign in to your Intelliprint account using your login credentials.
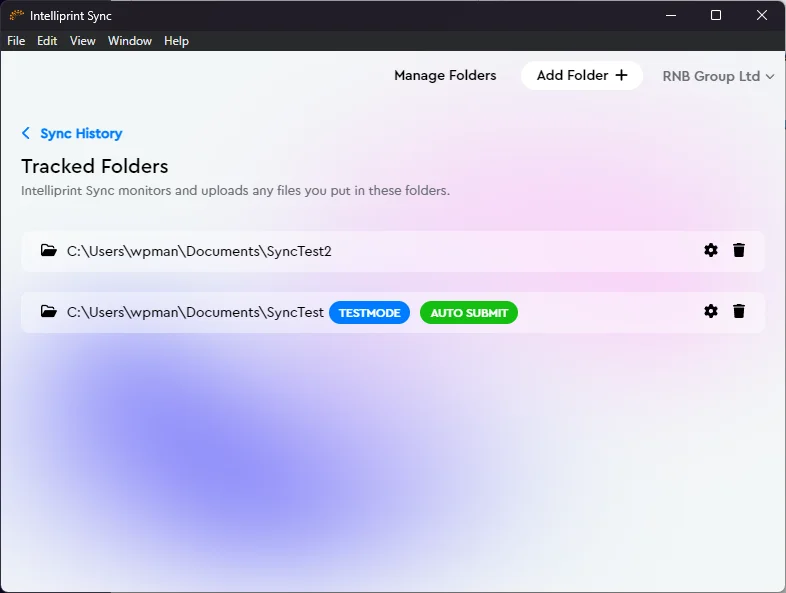
- Create a folder: In the Intelliprint Sync app, create a new folder on your computer that you want to monitor for postal mailings. You can create multiple folders with different settings based on your needs.
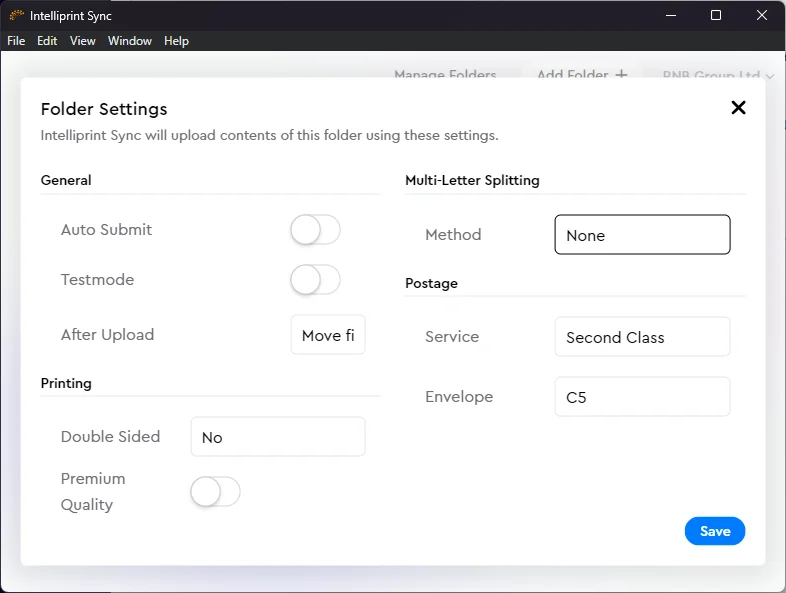
- Customise folder settings: Customise the settings of the folder you created based on your specific requirements. The settings include auto-submit, test mode, file handling options, splitting methods, printing options, postage options, and envelope types.
- Drop documents into the folder: Now, drop your documents into the folder you created. Intelliprint Sync will automatically upload the documents to your Intelliprint account for postal mailing, following the folder’s customised settings.
- Let Intelliprint Sync do the rest: Sit back and relax! Intelliprint Sync will take care of the rest and automate your postal mailings, saving you time and streamlining your process.
In conclusion, Intelliprint Sync is an easy-to-use application that can automate your postal mailings and make your life easier. Follow these simple steps to download, install and use the app, and start experiencing the convenience of automated postal mailings today!


API
Intelliprint isn’t just limited to its user-friendly platform. You can also leverage its powerful features using the Intelliprint API. This API is designed to streamline your workflow, allowing you to easily create, send, and track physical letters with just a few lines of code. With a simple and predictable URL structure, every endpoint is easily accessible. Plus, responses are JSON-encoded and use standard HTTP status codes, making it simple to integrate with your existing systems. To use the API, simply obtain an API key from the Intelliprint dashboard by clicking My Account > API Keys and start automating your letter printing and mailing processes today.
How to Prepare and Submit your Letters
How to split a document into separate letters for bulk mailing:
- Access the print preview page of your document.
- Click “Split into several letters” from the print preview page.
- Choose the splitting option that works best for you: split by a set number of pages or by using a unique word or phrase on the first page of each letter.
- Follow the prompts to complete the splitting process.
How to add additional documents to individual letters:
- Access the print preview page of your document.
- Click “Add additional documents” from the print preview page.
- Upload the additional documents you wish to append to each letter.
- Rearrange the order of the additional documents to suit your needs.
- Follow the prompts to complete the appending process.
Other features you may find helpful:
-
- Printing options: choose double-sided printing and mixed page sizes.
- Postage services: choose from a range of options including international delivery.
- Envelope sizes: select from C5, C4, C4+ padded envelope, or A4 box.
- Background: customize your letter background to include your own design or logo.
- Email confirmation: receive a confirmation email once your letters have been sent.
- Confidentiality: protect your data with secure and confidential handling.
Print History
If you want to keep track of your past print orders, you can easily do so by accessing the Print History tab on your account. This tab stores all the documents you have uploaded, including drafts, sent, cancelled, and pending orders. Here’s how you can access and view your print history:
- Log in to your account and click on the “Print History” option located on the left-hand menu.
- Once you are on the Print History page, you can filter the list by the status of the order using the drop-down menu. You can also sort each column by clicking on the column name.
- Clicking on an item in the list will take you to the Print Preview page (if the item is still a draft) or the Print Order page.
- On the Print Order page, you can view a breakdown of the order, including the amount, number of pages and letters, the splitting option used, postage services selected, upload and confirmation times, ideal envelope, double-sided print status, print quality, selected mail date, and confidentiality.
- You can also view a running breakdown of each letter in that order. Click the “Open PDF” button next to each letter to see the document. If you have used a signed-for service, tracking numbers will be displayed against each letter.
By following these simple steps, you can easily view your print history and keep track of your past orders.
How to Add Users and Teams
Intelliprint allows you to easily manage multiple users and groups of users through the use of Teams. Teams enable you to group users and set default options for all members of each team, making it easy to ensure that all members of a team are working with the same settings and preferences. Here’s how to create and manage teams:
Step 1: Access the “Users” Page To begin
click on the “My Account” tab and then the “Users” tab. This will take you to a page where you can view all users and teams on your account and add new users and teams.
Step 2: Add a Team
To add a new team, scroll down the “Users” page until you reach the “Teams” section and click the “New” button. Give your team a name and then click “Manage” to change available default settings for the team.
Step 3: Manage Your Teams
The “Manage” option allows you to adjust the default settings for your team. For example, you can set the default letterhead to be used for all letters sent by members of the team or set the default postage class for all letters sent by the team. Note that assigning backgrounds to a team is handled from the “Backgrounds” tab.
Step 4: Add Users to Your Teams
To add a user to a team, navigate to the “Users” page as described in Step 1. Click “New” next to the “Users” section of the page. Enter the user’s email address, select their role, and then assign the user to the desired team. Finally, click “Invite” to send an email inviting the user to join the system.
Step 5: Understand User Roles
Different user roles have different privileges within Intelliprint. Here’s a summary of the primary privileges for each role:
- Standard: Can send mail, view mail submitted from their account, select premium postage, and view returned mail they have submitted.
- Team Leader: All privileges of a standard user, can view all items submitted or returned by users of that team (except for items marked confidential).
- Team Admin: All privileges of a Team Leader, can add users to a team.
- Admin: All privileges of a standard user, all privileges of a team leader and team admin, can view all mail on the account (except for items marked confidential), and can set up new teams.
- Owner Account: All privileges of Standard, Team Leader, Team Admin, and Admin roles. Can view and manage billing reports, change billing details, and add new admins/leaders.
Keep in mind that the different user roles have different privileges within Intelliprint, as summarised in the list above.
How to View Returned Items in Intelliprint
With Intelliprint, you don’t have to worry about handling returned items. We offer a free return to sender monitoring service where any item returned for any reason is logged in our system. You will receive notifications for each returned item along with the specified reason, if any. This makes return management hassle-free and helps you keep your records updated.
Undelivered Mail Reports are a valuable feature in Intelliprint that helps businesses manage their printing and mailing processes more effectively. Follow these steps to view and manage returned letters:
Step 1: Navigate to the “Undelivered Mail” Tab
Log in to your Intelliprint account and select the “Undelivered Mail” tab in the interface.
Step 2: View the List of Returned Letters
You will be able to view a list of all the letters that have been returned. Check the items marked as returned by clicking on the item. If needed, you can download the individual letter by clicking the “PDF” button.
Step 3: Take Appropriate Action
By having access to the returned letters, you can take appropriate action to resolve any issues and ensure that your messages reach their intended recipients.
Benefits of Using Undelivered Mail Reports
Undelivered Mail Reports are an essential tool for businesses that rely on printing and mailing to communicate with their customers. With this feature, businesses can easily manage returned letters, reducing the amount of time and effort required to resolve any delivery issues.
Conclusion
Whether you’re a small business or a large corporation, Undelivered Mail Reports are a must-have tool for anyone looking to streamline their printing and mailing processes. With its easy-to-use interface and comprehensive functionality, Intelliprint provides businesses with the tools they need to ensure that their messages reach their intended recipients.
How to view Reports
Intelliprint’s reporting dashboard provides valuable insights into your mailroom operations, allowing you to optimise your processes and save time and resources. Here’s how to access and use the reporting tool:
- Log in to your Intelliprint account and click on the “Reporting” tab.
- On the reporting page, you can change the date range and drill down to a particular team or user.
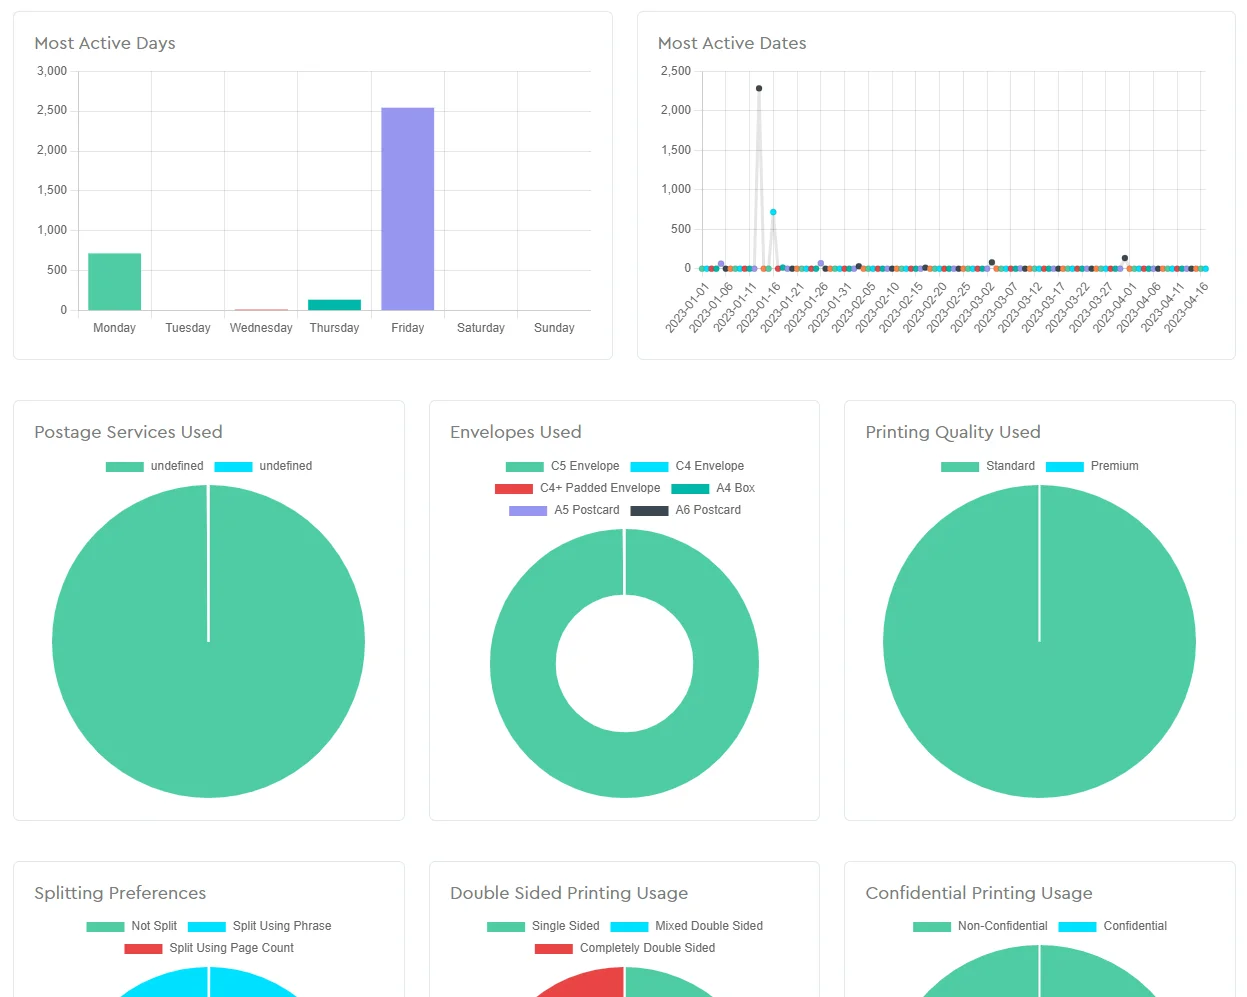
- Gain insights on important metrics such as the total spent (with VAT), letters sent, letters returned, pages, top users, top teams, most active days, most active dates, postage services used, envelopes used, printing quality used, splitting preferences, double-sided printing usage, and confidential printing usage.
By using Intelliprint’s reporting dashboard, you can gain valuable insights into your mailroom operations, helping you optimise your processes and save time and resources.


